

Key Takeaways
- A small set of hand tools handles the majority of everyday home repairs and minor projects.
- A cordless drill-driver is typically the single most useful power tool for new homeowners.
- Keeping basic consumables — fasteners, tape, spackle — on hand prevents unnecessary trips to the hardware store.
- Proper tool storage protects your investment and helps you find what you need quickly.
- Knowing when to call a licensed professional is just as important as having the right tools.
Start here
Why Every New Homeowner Needs a Starter Toolkit
Next
Essential Hand Tools
Then
Power Tools Worth Adding Early
Also useful
Supplies and Consumables to Keep on Hand
Finish with
Organizing and Storing Your Tools
Why Every New Homeowner Needs a Starter Toolkit
Owning a home means a near-constant stream of small maintenance tasks: a towel bar that needs tightening, a nail hole that needs patching, a shelf that needs hanging. Without any tools, each of these minor jobs becomes a call to a handyperson — and those calls add up quickly.
The good news is that a surprisingly modest collection of tools handles the vast majority of everyday repairs. You don't need a garage full of equipment to be self-sufficient. This guide walks you through exactly what belongs in a practical beginner's kit, what can wait, and how to tell when a job genuinely requires a licensed professional.
Before spending anything, it also helps to think about how tool costs fit into your broader household budget. Our guide to building a first monthly budget can help you plan for one-time setup purchases without disrupting your regular expenses.
Essential Hand Tools
These are the items you'll reach for most often. Build your kit around these before adding anything else.
Pilot hole
A small guide hole drilled before driving a screw or larger fastener. It prevents wood from splitting and makes the final fastener easier to drive straight.
Stud
A vertical framing board hidden inside your walls, typically spaced 16 inches apart. Screwing into studs provides a much stronger anchor than drywall alone.
Drywall anchor
A small insert placed into drywall before a screw so the screw has something solid to grip. Used when you can't screw directly into a stud.
Caulk
A flexible, paste-like sealant applied to gaps and seams around windows, trim, and fixtures. It dries to form a weather-resistant or waterproof seal.
Torque setting
A dial on a drill-driver that controls how much rotational force is applied before the clutch slips. Lower settings prevent screws from being driven too deep or stripping the material.
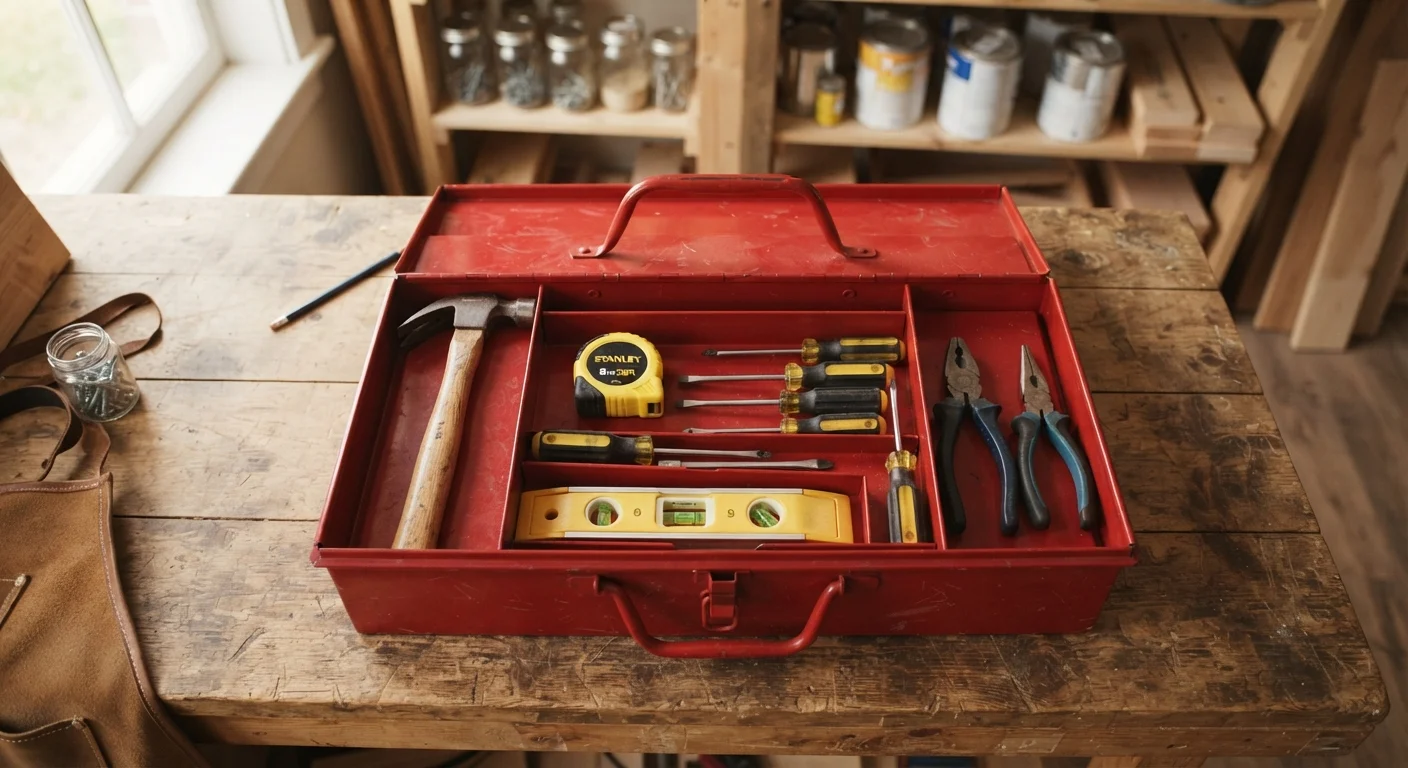
- Claw hammer (16 oz): Drives and pulls nails, taps trim into place, and handles light demolition. A 16-ounce head is a comfortable all-purpose weight for most adults.
- Tape measure (25 ft): Indispensable for hanging art, assembling furniture, and planning any project. Learning to read it accurately is a skill worth investing in — see our guide to reading a tape measure if the fraction markings trip you up.
- Screwdrivers: At minimum, one medium Phillips (#2) and one medium flathead. A 6-in-1 multi-bit driver covers both and saves drawer space.
- Adjustable pliers (slip-joint): Tighten supply line connections under sinks, grip irregular shapes, and handle light bending tasks.
- Needle-nose pliers: Reach into tight spots, hold small hardware, and bend wire.
- Utility knife with extra blades: Scores drywall, opens boxes, trims caulk, and cuts insulation.
- 4-foot level: Ensures shelves, frames, and fixtures are genuinely straight — not just eyeballed.
- Stud finder: Locates wall framing so you can hang heavy items safely without relying on drywall anchors alone.
Buy Quality Where It Counts
For tools you'll use constantly — your hammer, tape measure, and screwdrivers — it's worth choosing mid-range options that feel solid and comfortable in your hand. Cheaper versions of high-use tools tend to wear out or slip in ways that make tasks harder and less safe. Less-used specialty tools are better candidates for budget options.
Power Tools Worth Adding Early
Power tools expand what you can do, but they come with a higher price point and require more care. Prioritize based on the projects you actually anticipate.
- Cordless drill-driver: The single most useful power tool in a home toolkit. Drives screws, drills pilot holes, and assembles flat-pack furniture far faster than doing it by hand. Look for one with at least two battery packs so you're never waiting on a charge.
- Oscillating multi-tool: A versatile second buy — it cuts, sands, scrapes, and grouts with swappable attachments. Particularly useful for flush-cutting in tight corners and removing old caulk.
- Random-orbit sander: If you plan to refinish furniture or prep surfaces for painting, this saves considerable effort over sanding by hand.
Know When to Call a Professional
Any project involving your home's main electrical panel, gas lines, load-bearing walls, or roof structure should be handled by a licensed professional. Many of these jobs require permits and inspections under local building codes. Attempting them without the right credentials can create safety hazards and may affect your homeowner's insurance coverage. Always verify local permit requirements before starting any significant repair or upgrade.
Power tools for cutting lumber or tile (circular saws, angle grinders) are useful for larger renovation projects but carry meaningful injury risk. If you're not yet comfortable with basic hand tools, hold off on these until you've built some hands-on experience — or hire a professional for the cutting work.
Supplies and Consumables to Keep on Hand
Tools do the work; supplies make repairs last. Stock a small selection so you're not making a hardware run every time something minor needs attention.
- Assorted screws and nails: Keep a small compartmentalized container with common sizes — drywall screws, wood screws, and finish nails cover most situations.
- Drywall anchors: Hollow walls can't hold heavy loads on a nail alone. Plastic expansion anchors or self-drilling anchors handle most picture and shelf installations.
- Painter's tape and masking tape: Painter's tape protects trim and surfaces during paint touch-ups; masking tape is useful for labeling and temporary holds.
- Spackle (lightweight): Fills small nail holes and minor dents in drywall. A small container lasts a long time.
- Paintable caulk: Seals gaps around trim, windows, and baseboards to prevent drafts and water intrusion.
- WD-40 or a general-purpose lubricant: Quiets squeaky hinges, frees stuck bolts, and prevents corrosion on metal parts.
- Electrical tape: Low-voltage wire management and insulation for minor repairs — not a substitute for proper wiring work.
When a maintenance issue goes beyond your toolkit's reach, our troubleshooting checklist can help you decide whether to handle it yourself or call a professional.
Consumables Run Out — Check Periodically
Unlike tools, consumables get used up. Make a habit of checking your supply stock once or twice a year — after a busy project season is a natural time. Running low on spackle or caulk right when you need them is a minor but avoidable frustration. A short checklist taped inside your toolbox lid makes this quick.
Organizing and Storing Your Tools
A well-organized toolkit is faster to use and easier to maintain. Tools left loose in a drawer get damaged, rust, and go missing.
- Toolbox or tote: A basic hard-sided toolbox with a tray insert keeps hand tools separated and portable. A canvas tool tote is lighter and works well if you move around the house frequently.
- Pegboard: Wall-mounted pegboard in a garage or utility room gives every tool a visible home. If a tool isn't hung up, it's not put away — which makes it easy to spot gaps at a glance.
- Dry, climate-stable location: Metal tools rust when exposed to moisture. A damp basement or unconditioned garage can shorten tool life noticeably. Store tools in a dry area or use a sealed container with a desiccant pack if humidity is a concern.
Once your toolkit is in order, you'll find it opens the door to a much wider range of projects — from hanging shelves to tackling outdoor maintenance tasks. And as your home runs more smoothly, you may find more energy for the rest of your living space too — our home organization hub is a good next stop.